
Flower pounding has become super popular in the past few years and there’s a reason–it’s fun and takes advantage of all the beautiful springtime blooms. Plus, you can apply it to a variety of fabrics–tea towels, hats, skirts, shirts, you name it. Here’s how to do it yourself!

How to preserve flower bouquets you love
This is such a fun craft for those homeschooling kids who are a little older, who can handle a hammer. Try identifying your flowers first to make it educational, perhaps? Arts and Crafts and Botany all in one? Or, you can just get outside and start pounding out the flowers for art!
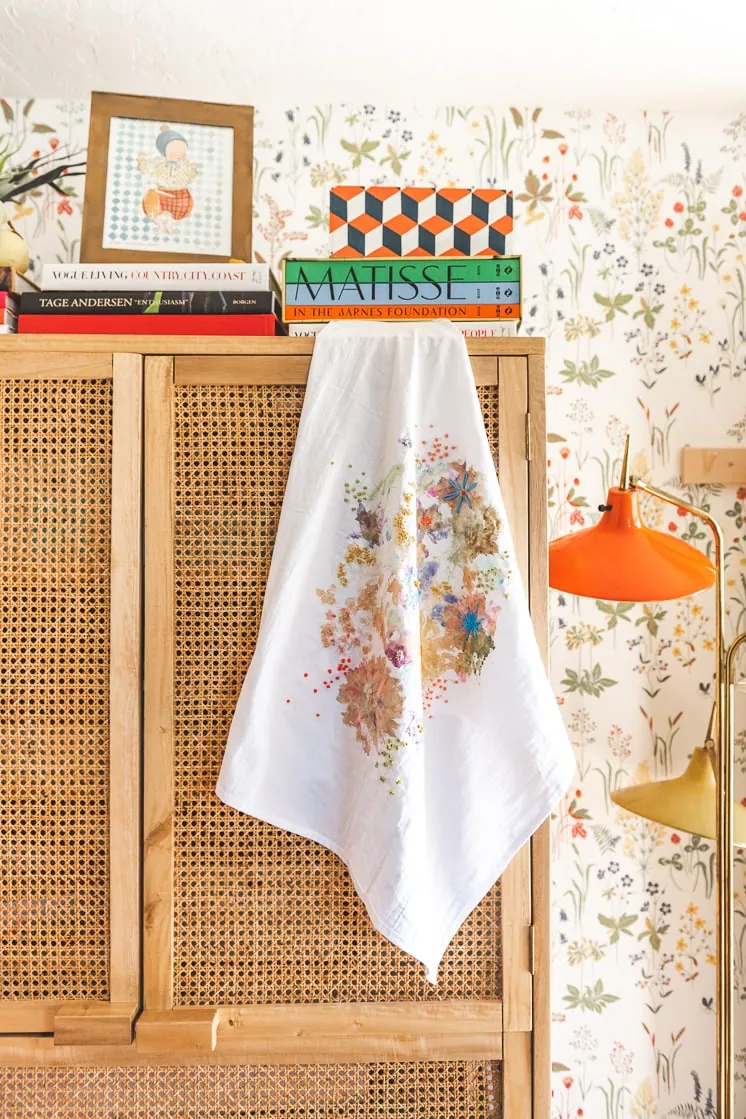
We love how these ended up, where the color from the flowers seeped into the canvas to look like paint. We added a little Lars oomph by embroidering on top of the pounded flowers, too! This is such an awesome way to preserve flowers too, if you are looking for a way to keep a special bouquet forever.
The best flowers for flower pounding
This can work for single flowers (red roses from Valentine’s Day anyone?) or bouquets with special meaning (Mother’s Day is just around the corner!). You might even want to try the Flower Pounding technique on a wedding bouquet, to turn it into something beautiful to display in your home. Plus, then you get to keep your flowers bright and fresh forever. Please note, not all flowers work well. We tried out a lot of options and found that the following leave the best impression:
- Cosmos (these work out the very best! Great shape, leave a great color)
- Nasturtiums
- Roses
- Morning Glories
- Calibrachoa or petunias
- Garden Phlox
- Russian Sage
- Amaranth
- Celosia
- Hydrangeas
- Hydrangea Leaf, Cosmos Greens, Coleus, & Ferns
Tip: Don’t wash it! The color will come out. Instead, use it as decoration!
Flower pounding 101
Difficulty:
Easy
Time:
1 hour
Instructions
Prep
- Pre-treat your fabric. I used 1:16 ratio of Alum to water and set the fabric in that solution for several hours. Once it had soaked there, I washed it on a rinse only cycle in the washing machine and let it air dry. We used cotton towels and napkins, but you can choose what fabric you would like to use.
Flower pounding
- Take a piece of scrap wood, and lay it on a flat surface.
- Lay your fabric on top of the wood and position it so that the wood will be backing where you will be hammering your first flower.
- Select the flowers you want to use and arrange them on your pounding material. Ensure the flowers you pick out are vibrantly colored and have thin petals. Only use the bud of the flower, not any of the stem.
- Place your first flower face down onto the fabric. Make sure to spread out each petal so that they are not folded or crumpled.
- Place a piece of wax paper over the flower and hold it in place while beginning to hammer.
- Hammer from the outside of the petals towards the middle and keep hammering until you see the flower become darker from the pigment lifting – that means that it transferred color onto the fabric.
- It may be easier to take your soon-to-be masterpiece outside and pound on the pavement or sidewalk.
- Make sure that while you hammer the flower stays in the exact same position. Any shifting will show up and make the finished product less crisp.
- Once you are done hammering, gently lift off the wax paper and brush away any leftover bits from the flower.
- Continue hammering flowers all over the fabric until you are content with the layout.
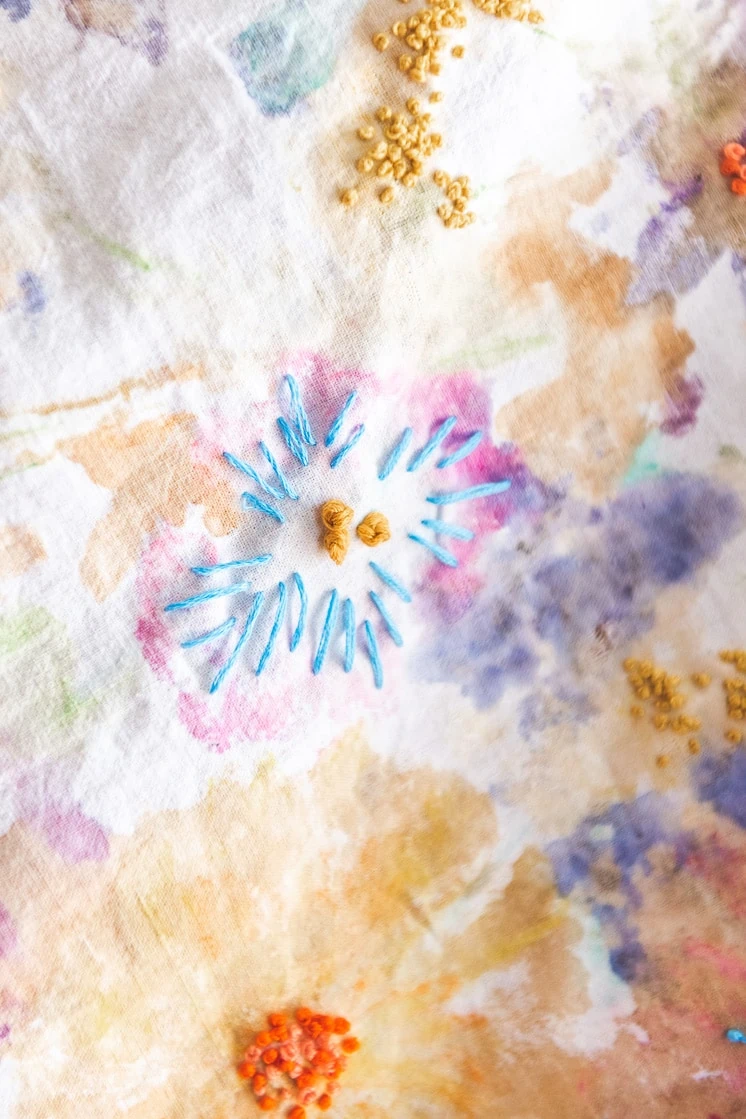
- Finally, embellish however you like! Your fabric will be beautiful just as it is, but if you want, you can add some pretty embroidery to your fabric piece, like lazy daisy stitches or French knots! At our Lars Craft Camp we had the girls embroider their initials, so that could be a fun addition as well!
Add embroidery onto flower pounding
In one variation we did, I felt like we needed a little more definition in the flower pounding so we added in some embroidery. Plus, it added in some beautiful color.
Embroidery tips
Some embroidery stitches used were the following:
- French knots
- Lazy daisy
- Simple line stitches
You can find our guide to embroidery stitches here
Would love to see your masterpieces. Tag us with #LarsMakes of #LarsEmbroidery
[ad_2]
Source link